

Creating Accessible PDF Documents In Adobe Acrobat XI
This resource is designed to be printed as a one page PDF file. An HTML version is also available below.
Video Tutorial
1. Run “Make Accessible” wizard
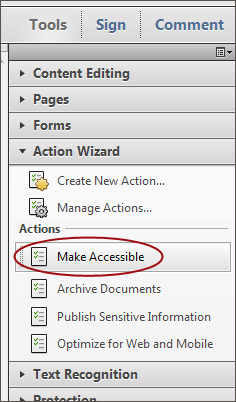
Select Tools from the upper right corner, then select Action Wizard > Make Accessible from the sidebar. Select Start button.
- Add Document Description — Enter a descriptive page Title. Other fields are optional.
- Set Open Options — Runs automatically
- Recognize Text using OCR — If your PDF is not true text, it will be converted into true text during this step. If you are not sure if your PDF is true text, one easy test is to search for a word that you know occurs in the document. If no results are found, it needs to be converted to text.
- Detect Form Fields — Only necessary if your page contains fillable forms.
- Set Tab Order Property — Runs automatically
- Set Reading Language
- Add Tags to Document — PDF “tags” provide accessibility information to screen readers. If your document does not have tags they will be added during this step. You will need to check the quality of these tags later on.
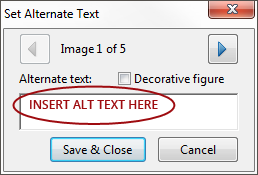
- Set Alternate Text — A window will appear that allows you to add alternative text. Use the arrows to move between images and check Decorative figure if the image should be ignored by a screen reader.
- Run Accessibility Full Check — This checker will show additional issues. Right click errors and warnings and select Fix to address the issues, Skip Rule if the issue has been addressed, and Explain to read online help.
2. Add/Change tags
The TouchUp Reading Order tool allows a user to quickly add and edit PDF tags and view the reading order of elements on the page. To edit tags, do the following.
- From the right-hand menu, select Tools.
- Then select Accessibility > TouchUp Reading Order. If the Accessibility option is not listed, use the Options button to check Accessibility on the menu.
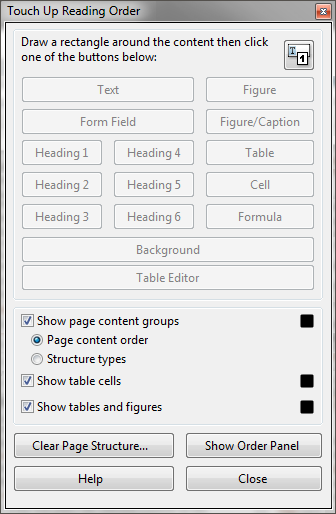
- When selected, the view on the screen changes. All of the content is enclosed in numbered boxes. Each of these boxes represents a tag and the number corresponds with the reading order in the Order panel.
- Select the Structure Types radio button. The page will now display tag types instead of reading order.
- Within the TouchUp Reading Order window you will notice a group of buttons with the names of several common tags. You can use these buttons to assign tags to selected text or objects. Use the Text button for body text and the Heading 1-6 buttons to assign correct heading levels.
You can also add/edit the following tags in the TouchUp Reading Order tool:
Images and alternative text
- To tag a part of the page as an image, drag a box around the image and select the Figure button.
- To add or change alternative text, Right click on the image, select Edit Alternate Text.
- Enter the appropriate alternative text in the dialog box.
Table headers
- Select a table and then select Table Inspector. Table header cells will be identified in red.
- Select a table or cell by dragging a box through the cells (not around them or you might select additional cells). Right click on a selected cell(s) and choose Table Cell Properties. A dialog box will appear.
- If the selected cell(s) needs to be tagged as a header, select the Header Cell option and assign a scope of either Row or Column.
Move items to/from the background
- Select an element you wish to move to the background (i.e., it will be ignored by a screen reader) and press the background button. This may include repetitive headers or footers.
- If a part of the page is not in a gray box then it is already in the background. If it should be read by a screen reader, select the item and press the appropriate button (e.g., Text, Heading 1-6, Figure).
3. Check/edit reading order
The TouchUp Reading order tool can also allow you to change the reading order of the page content so it matches the visual reading order.
- Select the Page Content Order radio button. Reading order will now be displayed in the page instead of tag type.
- Select Show Order Panel. The Order Panel will appear in the left sidebar with numbers that correspond to the numbers in the page.
- To change the reading order of an element in this panel, click and drag the tag to the location that reflects the correct reading order.
Note
It is easier/better to make documents accessible as they are created. See our other cheatsheets to make documents accessible in MS Word, PowerPoint, and InDesign.
Made possible by a grant from the Fund for the Improvement of Postsecondary Education (FIPSE), US Department of Education. No official endorsement implied.