

Creating Accessible Microsoft Word 2013 Documents (Windows)
This resource is designed to be printed as a one page PDF file. An HTML version is also available below.
Heading Styles
Create a uniform heading structure through use of styles in Word. This allows screen readers to navigate a document and improves accessibility for everyone.
Adding and Editing Headings

- Select the text and choose the appropriate style under Styles on the Home ribbon. (e.g., "Heading 1")
- Headings 1, 2, or 3 can also be assigned using Ctrl + Alt + 1, 2, or 3, respectively.
Alternative Text for Images
Images can be given appropriate alternative text in Word. This Alt text is read by a screen reader in a Word file and should remain intact when exporting to HTML or PDF.
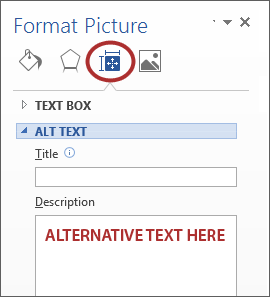
Adding Alt Text
- Right-click on the image and choose Format Picture.
- Select the Layout & Properties icon and choose Alt Text.
- Enter appropriate Alt text only in the Description field (not the Title field).
Columns
When creating columns, always use true columns, not columns created by hand with the Tab key.
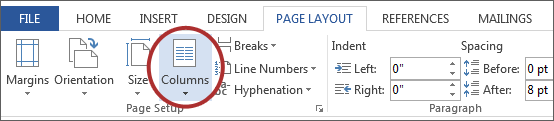
Creating Columns
- Select Page Layout on the ribbon.
- Select Columns under Page Setup and choose the appropriate number of columns.
Lists

Use true numbered and bulleted lists to emphasize a point or a sequence of steps.
Creating Lists
- Select the Numbered List or Bulleted List option on the Home ribbon, under the Paragraph section.
Links

Word automatically creates a hyperlink when a user pastes a full URL onto a page. These may not make sense to screen reader users, so more information is needed.
Adding Hyperlinks
- Select the text you want linked, right click, and select Hyperlink or Ctrl + k.
- Make sure the text in the Text to Display field is a meaningful description and type the link URL in the Address bar.
Data Tables
Accessible tables need a clear table structure and table headers to help guide a screen reader user.
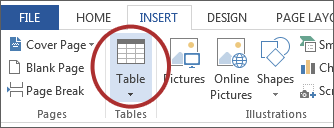
Creating Tables
- Select the Insert tab on the ribbon, then select Table > Insert Table.
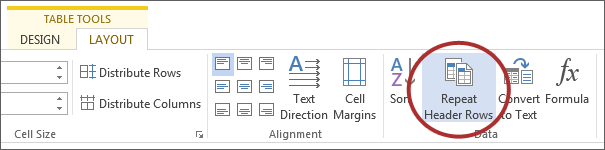
- To add table headers to the first row, select Table Tools > Layout on the ribbon, then choose the Repeat Header Rows option in the Data section.
Options in the Design tab may be used to change appearance but will not provide the necessary accessibility information.
Accessibility Checker
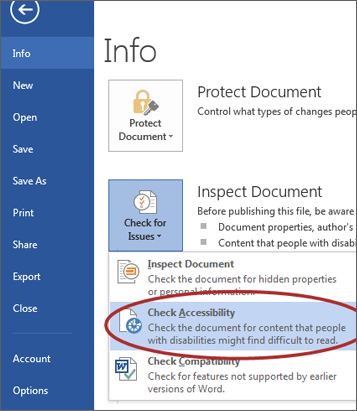
Word includes an accessibility resource that identifies accessibility issues.
- Select File > Info.
- Select the Check for Issues button and choose Check Accessibility.
- The Accessibility Checker task pane will show accessibility errors, warnings, and tips on how to repair the errors. Select specific issues to see Additional Information at the bottom of the task pane.
Other Principles
- Ensure that font size is sufficient, around 12 points.
- Provide sufficient contrast.
- Don't use color as the only way to convey content.
- Provide a table of contents for long documents.
- Use simple language.